“On your mark, get set, go!”
“Huh? I don’t even know what we’re playing!”
Have you ever tried playing a game or doing an activity that wasn’t explained completely or didn’t make sense to you? This can be confusing and frustrating for everyone involved. In order to successfully set our students up for success and make sure that they understand why we do certain activities, here are some strategies to help you successfully frontload and debrief.
What is Frontloading?
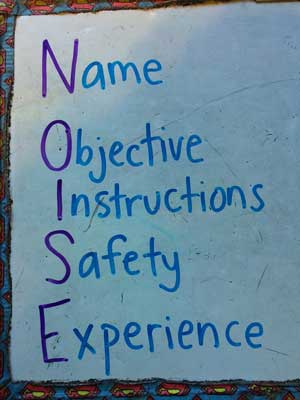 Frontloading is explaining and giving clear, concise instructions before starting an activity. There are several key components in making sure that you are frontloading an activity properly. A good way to remember some of these things is the acronym NOISE . It stands for Name, Objective, Instructions, Safety, Experience.
- NAME: It’s a good idea to start off the activity giving the Name of the class/activity/game. This way your audience can remember the activity and you can reference it throughout the week; Also, your students will know what you’re talking about.
- OBJECTIVE: After giving the name of the game, it’s good to give students an Objective. This helps explain the goal of the class/activity/game. Depending on the activity, the objective could be to be the last person in the game, or to collect the most poker chips.
- INSTRUCTIONS: After the objective is made clear, it’s time to give some Instructions. Instructions should be clear and concise and should explain how you do the class/activity/game.
- SAFETY: Next comes one of the most important parts of a frontload, Safety. You should explain specific safety components to the activity or game. These can include the 3 E’s for safety: Environment, Equipment, Element.
- EXPERIENCE: After checking for students’ understanding of rules, it is finally time to Experience the class, activity, or game.
A bit more on Safety…remind yourself of the 3 E’s:
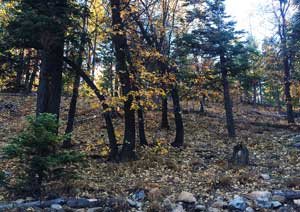
Pretty but FULL of tripping hazards
- ENVIRONMENT: for the Environment, look around the area of the activity for any hazards, and create boundaries for students. You should try to choose a flat spot free from potential hazards (like lots of sticks and rocks) before starting. If, however, the area that you’ve hiked to has some obstacles (we are teaching in a National Forest surrounded by trees, sticks, rocks and other potential hazards), you can modify the rules to maximize safety. For example, students can walk with ‘heel-toe’ movements rather than running for the activity. Make sure to also set up Boundaries for the activity. Physically show the boundaries so students know exactly where they can/can’t go. Pointing out boundaries from a stationary position near the students, or saying that the boundaries are “10 feet from here” can be confusing. If you tell students, “See that tree, (log, rock etc.) over there…that’s your boundary!” Students are probably going to ask “Which one? This is a forest.”
So….To make boundaries more clear, physically jog out the boundaries for students to see or use objects (like your student’s backpacks) as a physical perimeter. Getting your students in a circle, and each taking 10 steps backwards and placing their backpacks behind them is a great way to set up a physical perimeter. 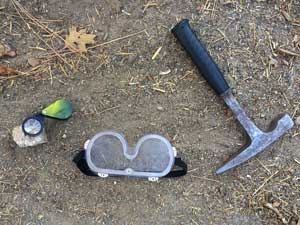 EQUIPMENT: next, look at any Equipment that students may be using for the activity and explain how you can use it safely.
For example, in our Breaking Rocks experiment we break rocks open to illustrate weathering. We use hammers, safety goggles, and hand lenses; it is important to model and describe wearing safety goggles before and while smashing rocks and how to properly hold a hammer, making sure to be on your knees and put the other hand behind your back so it doesn’t get smashed.
- ELEMENT: Also, if there is an Element involved (like at the Adventure Course) make sure to go over safety instructions for it. For example, on our Whale Watch: only enter and exit from the middle of the board, don’t stand on the outer edge of the board, no jumping, etc.
 After mentioning all safety instructions, make sure to set up reasonable consequences for students who don’t follow safety rules or instructions (they can sit out a round or activity, their team gets a penalty, they lose the opportunity to earn a bead , etc.).
Be sure to enforce your safety rules right away and follow through with your consequences; the rest of your teaching time will be smooth because of this.
What is Debriefing?
Debriefing is a way to bring closure to an experience and get students to think about how ideas or activities can impact the future. A great way to do this is to follow the What? So What? Now What? Model.
- WHAT: For the What? you want students to reflect and process, then objectively report on the facts and events of the experience or activity.
What did we just do in our Breaking Rocks experiment?
Q: Now that we have all had a chance to break open rocks and view them through the magnifiers, let’s share with a partner what characteristics we see on the outside versus the inside of our rocks (Think/Pair/Share).
Q: How does the inside of your rock look as compared to the outside? Does it look different? Why?
A: The rocks do look different on the inside, because there has been weathering occurring on the outside of the rock. - SO WHAT: For the So What? you want students to generalize and analyze the experience from the perspective of the academic discipline. One way to help debrief a class is to provide concrete examples. You can use specific details from the activity to help illustrate how it connects with/reinforces the overall lesson. (These are often included in our lesson plans and activity glossary for specifics).
Another way to debrief is to get students talking and answering questions. You can ask review or thought-provoking questions to keep students actively involved and to help tie-in the material to the overall lesson. One way you can do this is by Think/Pair/Share. Sometimes to get students talking more comfortably, they can discuss with a buddy first some of these questions and then you can call on the pairs to share with the group.
So what? Why is this important?
Q: Why might a scientist/geologist be interested in the inside of a rock?
A: The inside of the rock is untouched; the outside has been affected by the environment around it.
Q: Is it important to see the inside/untouched portion of the rock?
A: Yes, it may be easier to classify the rock if we can see it in its ‘original’ state. - NOW WHAT: And finally is Now What? There should also be a take home piece of the debrief that gets students thinking about how the activity can be incorporated into their everyday life once they leave High Trails. This gets students to apply what they have learned and to consider the impact of the experience on themselves and their community in their everyday lives.
Now what do we do with this information?
Q: Why does weathering matter in our everyday lives?
A: We do have lots of things made from rocks that we use in our lives. Many buildings and statues are made from rocks like granite or marble and they can be weathered the same way like the our rocks we broke in class.
Q: What will happen overtime to these buildings and statue?
A: Weathering will cause them to breakdown overtime. They may even become so weathered that they are no longer buildings, but become sand!
Q: How can we prevent weathering from occurring?
A: Weathering is a natural occurrence overtime, but a lot of chemical weathering of rocks is caused by acid rain. Acid rain is caused by human air pollution that rains down and weathers rocks. If we pollute less, then we can help slow down the weathering of things made from rocks.
Q: Is the phrase “solid as a rock” always true?
A: No; even rocks break down with time. This is how even mighty mountain ranges like the Sierra Nevada can change over time.
So…
 Next time you are about to teach an activity, remember the importance of frontloading and debriefing. A thorough frontload sets students up for success in following instructions of the activity and a good debrief provides students with a purpose of the activity and how it can apply to their lives at home. Be sure to think/pair/share with a friend how you can utilize this information in your everyday life.
At High Trails Outdoor Science School, we literally force our instructors to write about elementary outdoor education, teaching outside, learning outside, our dirty classroom (the forest…gosh), environmental science, outdoor science, and all other tree hugging student and kid loving things that keep us engaged, passionate, driven, loving our job, digging our life, and spreading the word to anyone whose attention we can hold for long enough to actually make it through reading this entire sentence. Whew…. www.dirtyclassroom.com
Comments are closed.